How to sew a sleeve?
When you're just starting out in sewing, it can seem daunting to think that you're going to have to sew a sleeve. That was certainly the case for me when I started a few years ago. But I quickly realized thatit was more frightening than difficult!
So grab your pattern and I'll show you how to do it in a video!
Properly deciphering your pattern
But first things first, let's start with the basics, i.e., the pattern Here is one of my patterns. But I repeat, it works with other pattern too 😉
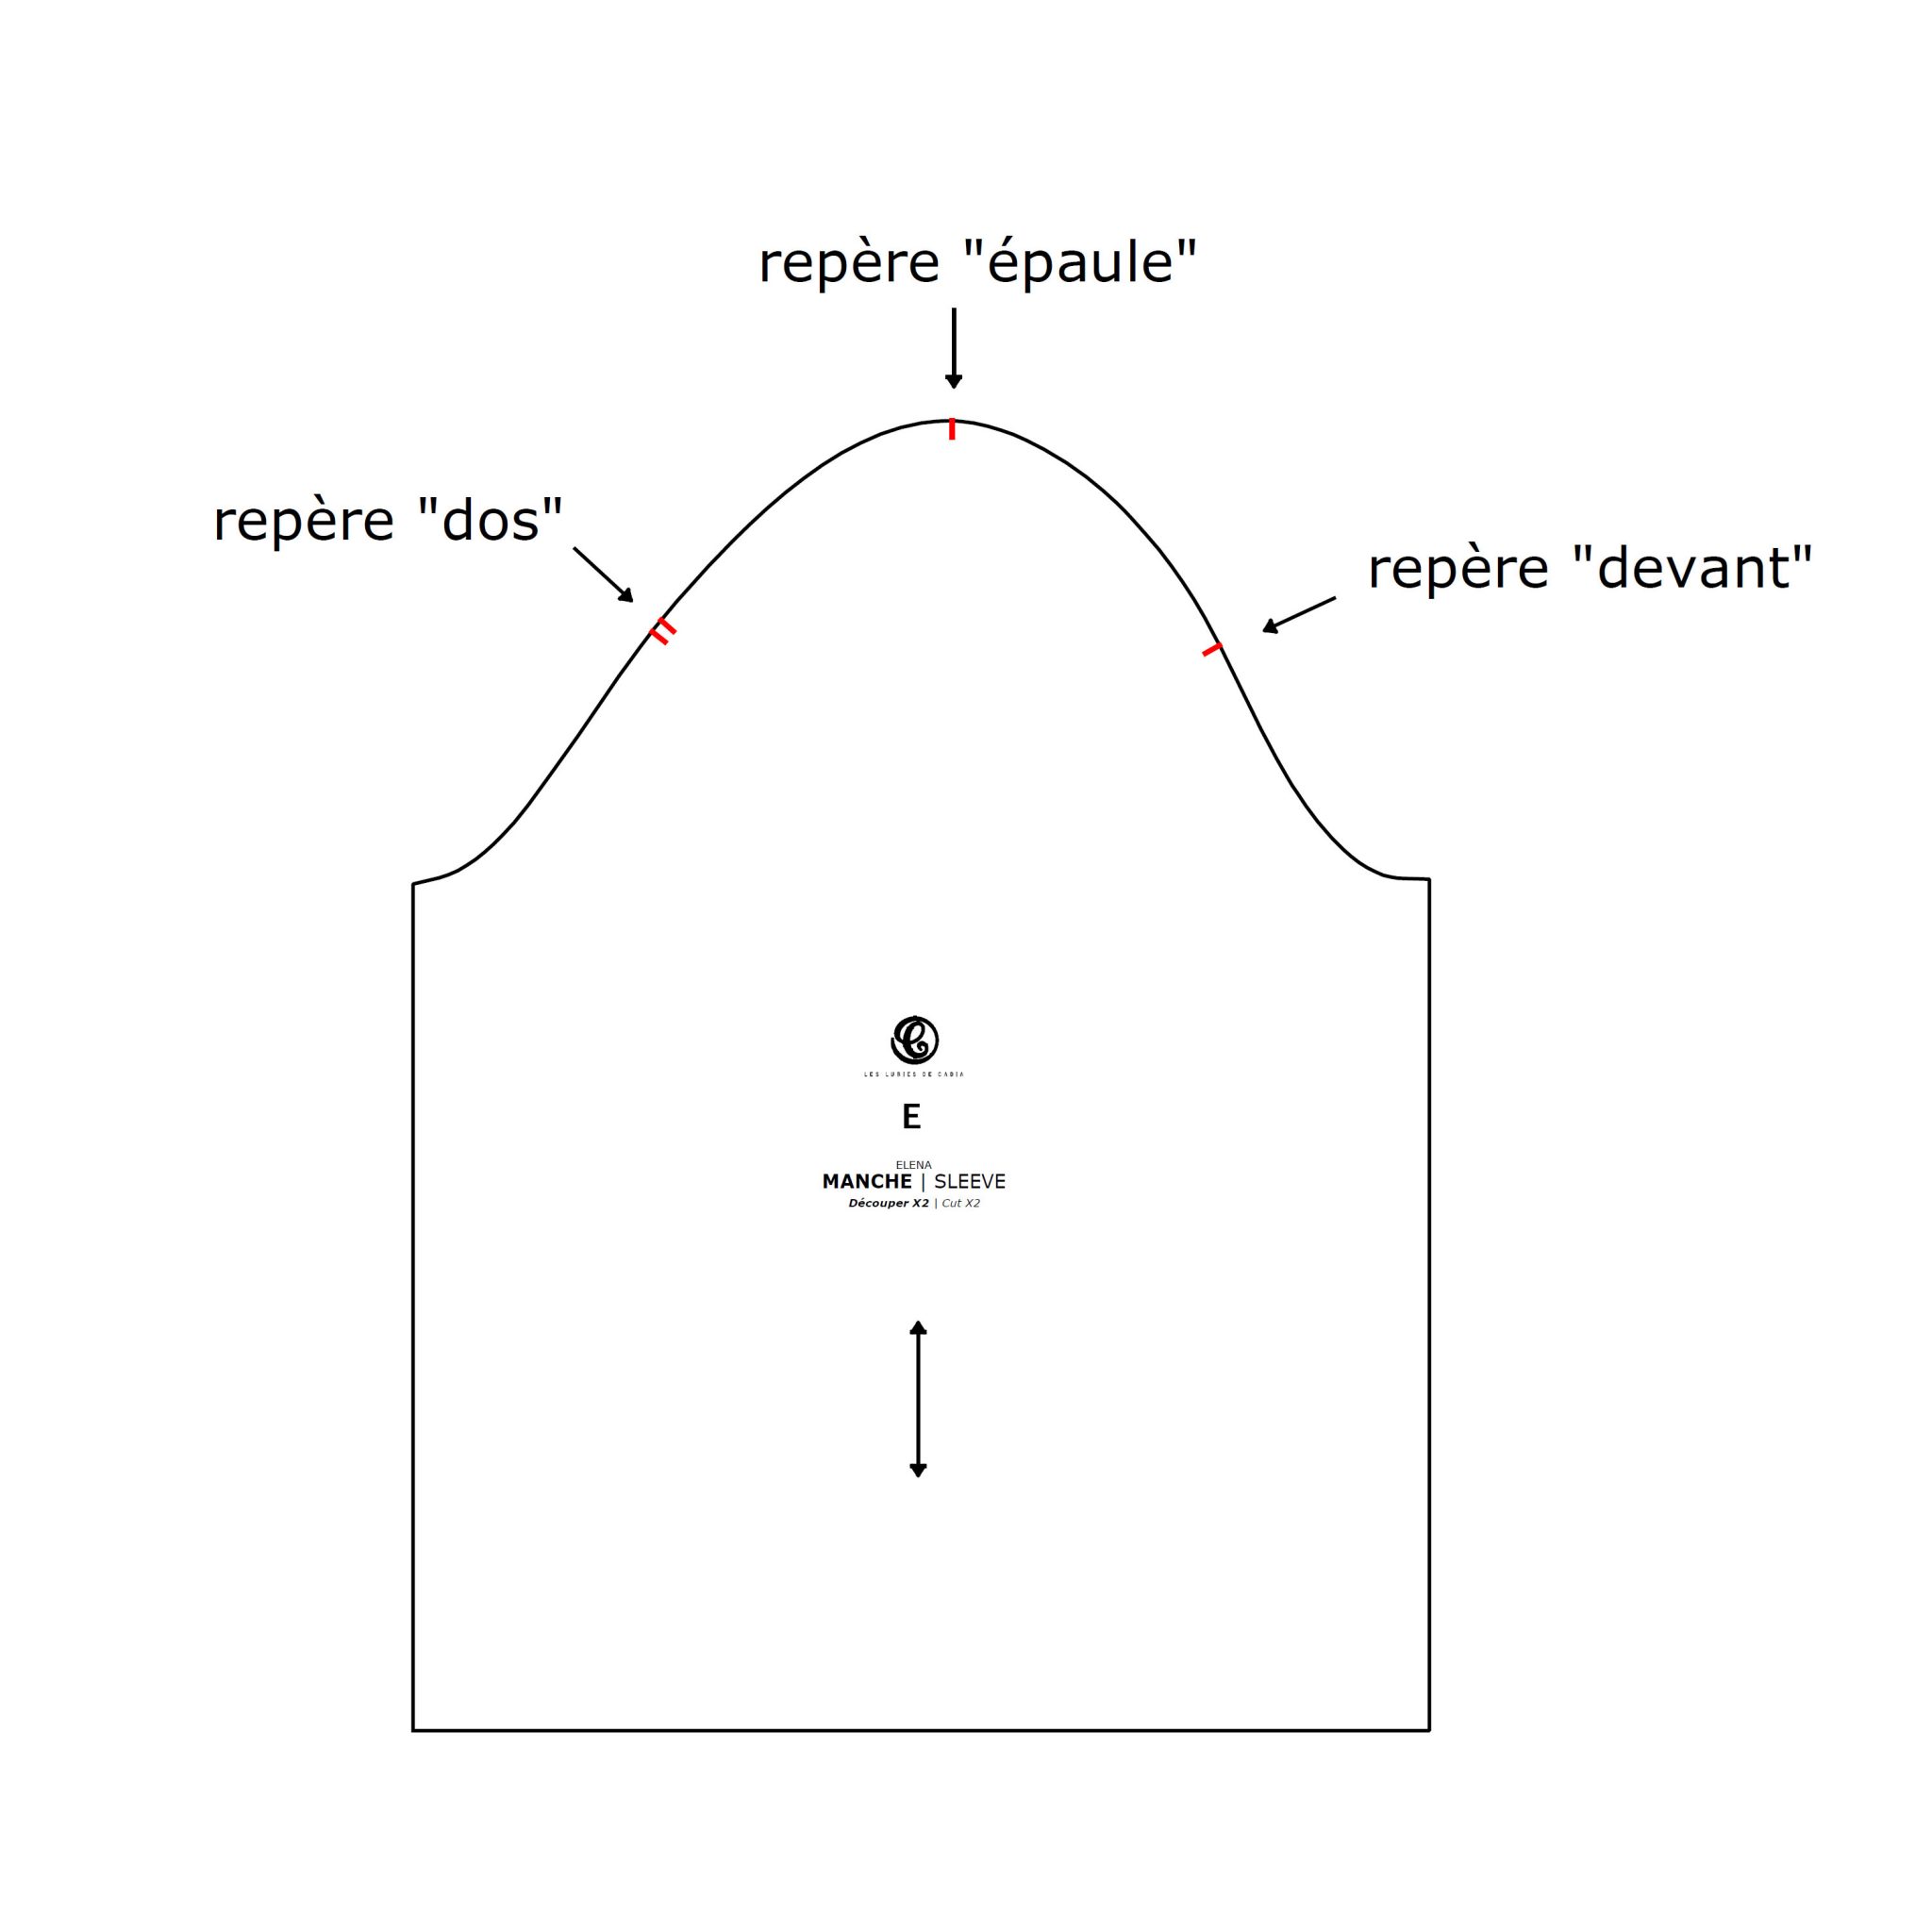
The first thing to look at isthe handle head. There are usually three markings:
- A mark that corresponds to the middle of the shoulder (this is the top mark),
- A mark that corresponds to the back of the garment (the one on the left_ On my sewing patterns, I draw a double mark so that I know we are at the back).
- and a mark that corresponds to the front of the garment (the one on the right).
As I explain in the video, it is really important to transfer these markings onto your fabric.
The gathering lines
Gathering linesarealmost always used when assembling a sleeve. In the model I am showing you, they are used to creategathersatthe shoulder cap. But if you don't have any gathers in this area, the gathering lines will simply allow you to reducethe excess fabricinyour sleeve.
The embu-what? Ha ha, here's a technical term that I didn't understand when I was starting out! To put it simply, on many patterns, the sleeve (or sleeve cap) is slightly larger than the armhole of the garment. This excess fabric is called the embu. It allows for gathers or a little volume at the sleeve cap.
If you just need to reduce the excess fabric (without creating gathers), the gather lines will help you distribute this excess fabric.
For the tutorial, I invite you to watch all the details in the video at the beginning of the article 😊
See you soon,
Cadia