How to sew panties without pattern
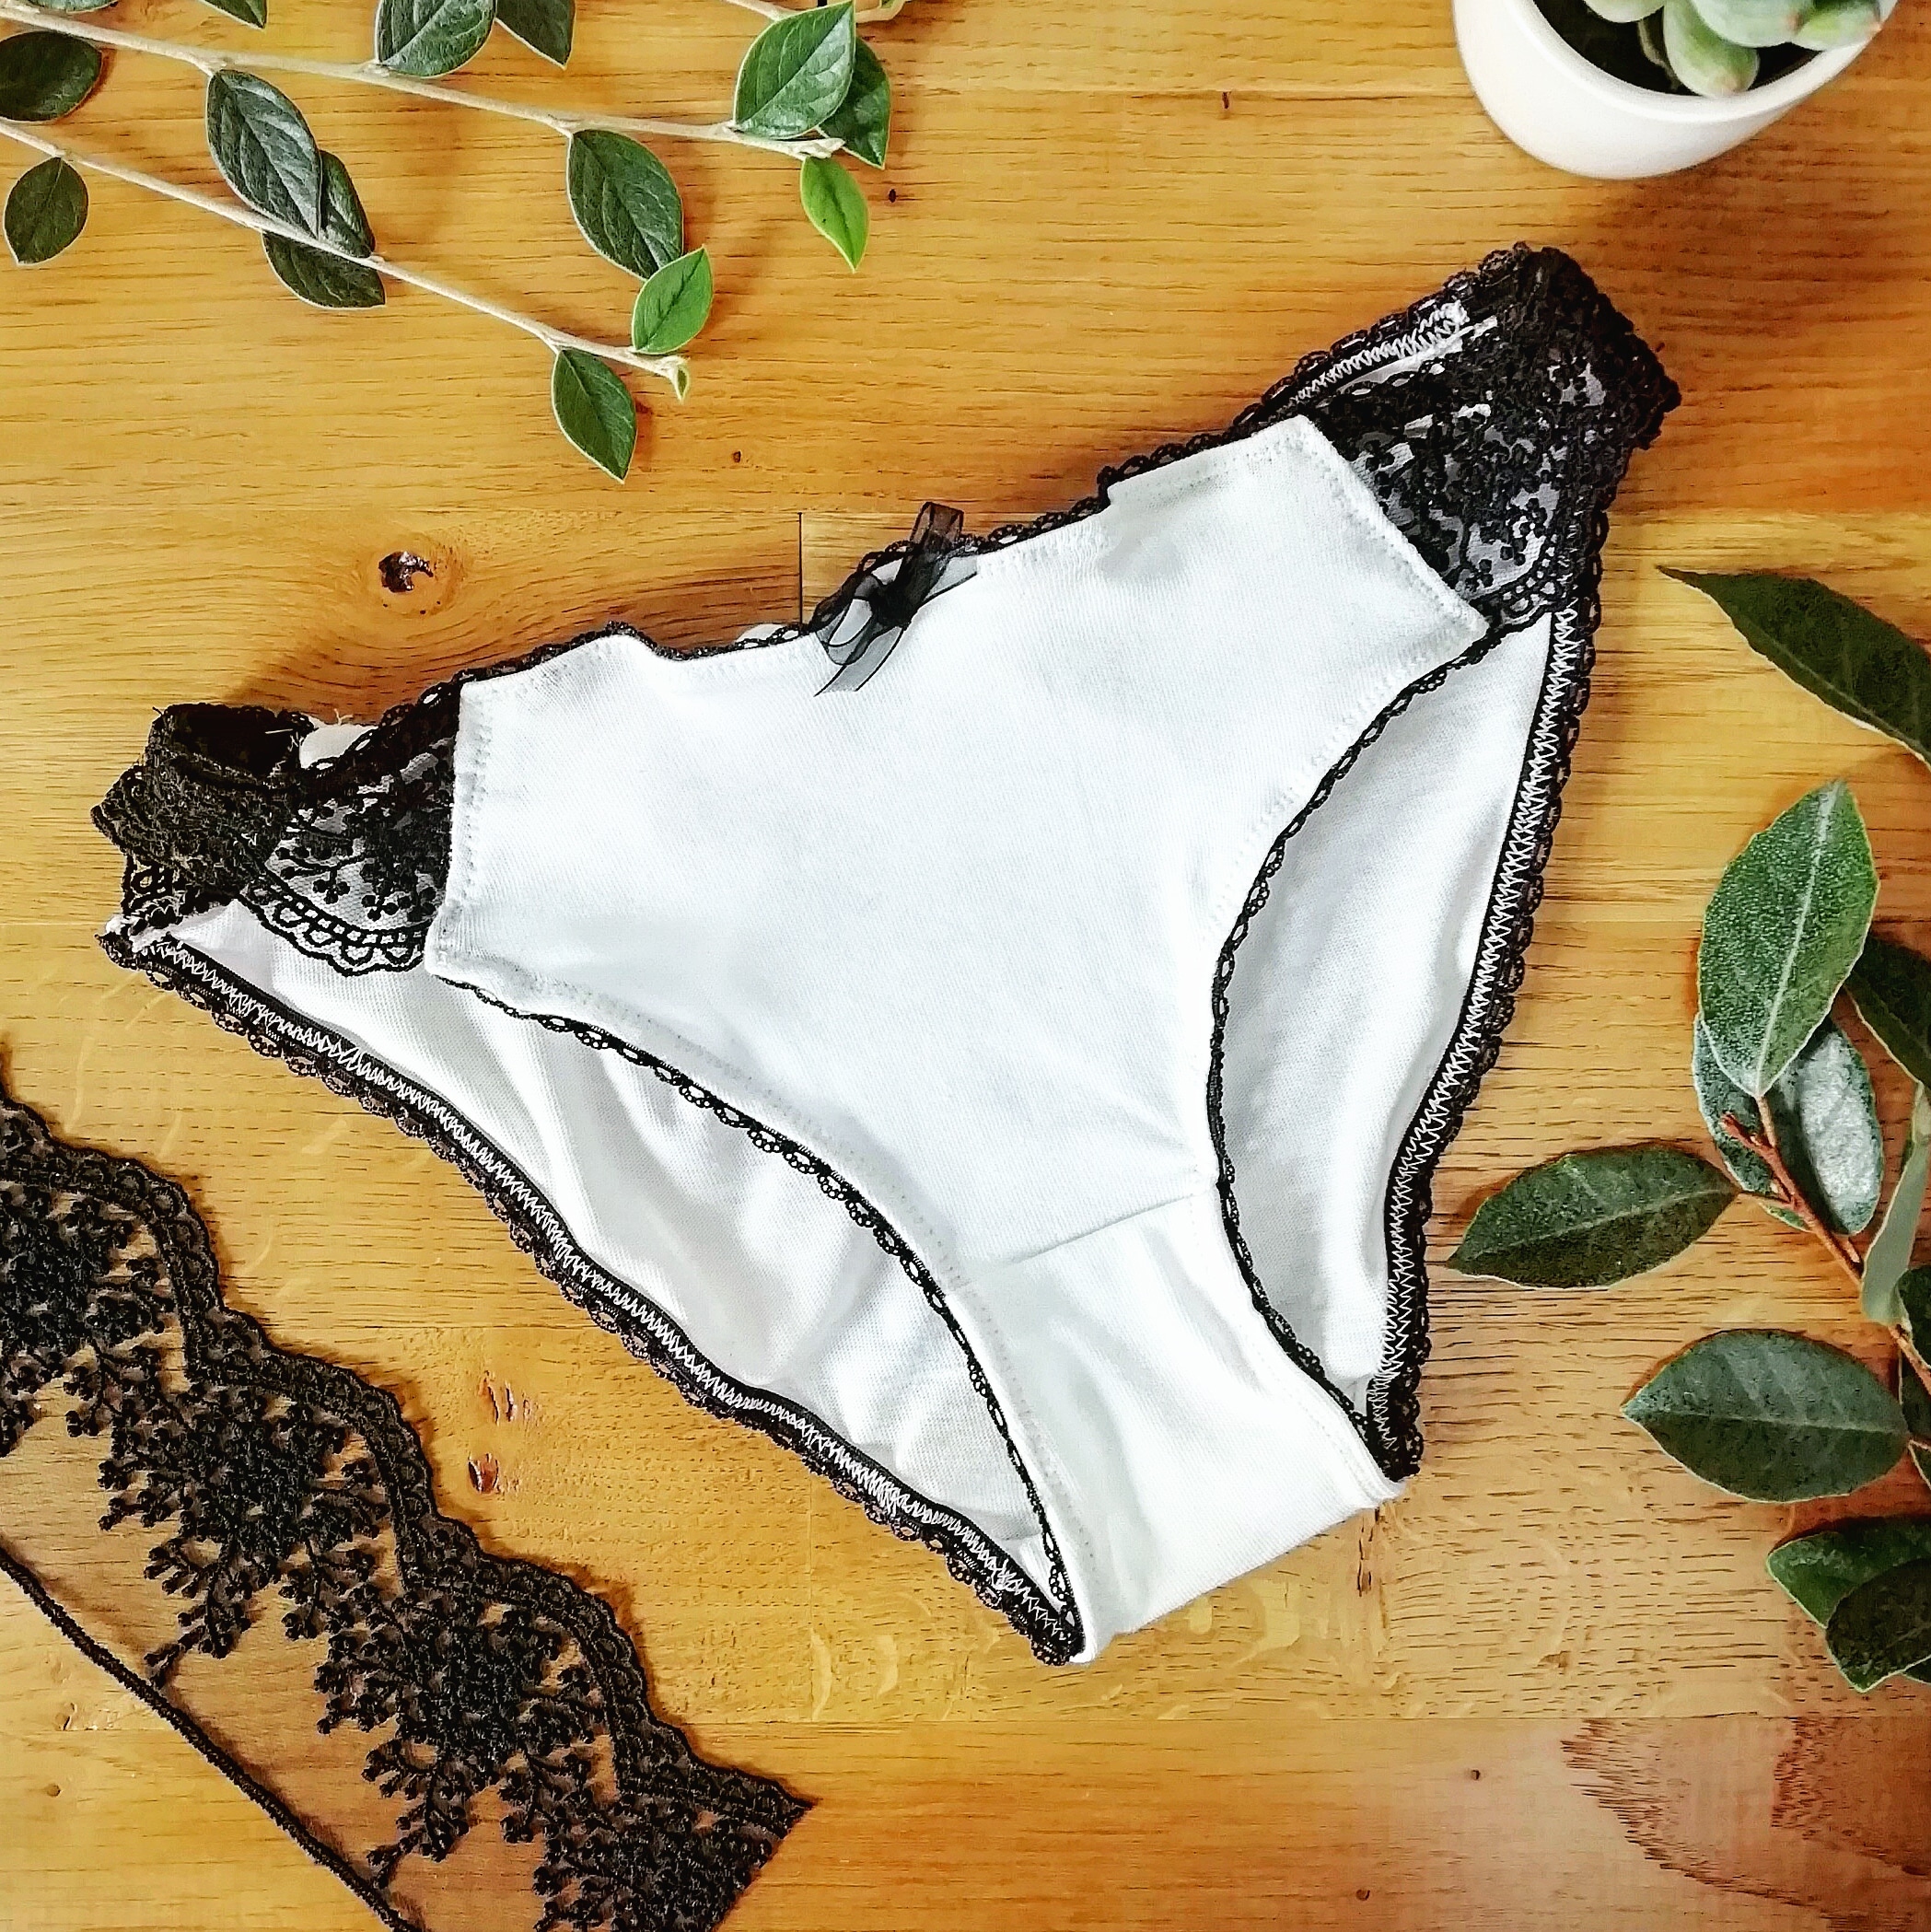
Here is an article that will help you recycle your fabric scraps while making a pretty creation. Today, we're going to learn how to sewpanties! But be careful, for this tutorial you will need stretchy fabric, because wearing stiff panties is not very comfortable 😅
This tutorial is intended for individuals who are comfortable working with jersey fabric.
The equipment
First, to sew these panties, you will need:
- an old pair of panties that you feel comfortable in,
- one sheet of A3 tracing paper,
- a felt-tip pen and a pen,
- an elastic band (7-10 mm wide and 1.5-2 m long) with a picot or lace edge,
- scraps of elastic fabric,
- thread of the same color as the elastic,
- thread of the same color as the fabric,
- a needle with a rounded tip to avoid puncturing the fabric or causing the stitches to slip.
What fabric should I choose for sewing panties?
As I said, you will need stretchy fabric; I recommend using jersey ( if it contains elastane, even better! This will make the panties more durable over time). You'll usually find cotton jersey, but you can also use wool.No, no, I'm not talking about the thick knits used to make sweaters 😅, but rather very finely knitted wool jersey. That's the option I chose for this tutorial, using plum-colored wool jersey. Compared to cotton, wool has a very high moisture absorption capacity. So, with the same amount of water, wool will always appear drier than cotton (which is handy for perspiration 😉).
I recently made a nice discovery that could also be interesting for lingerie: lyocell. This fabric has the unique feature of being sustainable. It is made from wood pulp, and the water used in the production cycle is recycled (which is not the case with cotton, which is very water-intensive). I haven't had the opportunity to buy any yet, but I plan to try it out soon!
Finally, when it comes to textiles (which I love talking about 😍), you can also use stretchy synthetic fabrics (usually polyester). But be careful, although they are more affordable, these fabrics do not allow the skin to breathe.
Do I need a serger?
Since I don't have a serger at home, the answer is no. The zigzag stitch will be our ally for this cheeky tutorial!
How do I choose the elastic for sewing these panties?
There is a wide variety of elastic bands available. I recommend going to a haberdashery store and asking for elastic bands for lingerie. Not all haberdashery stores sell them, or they may only have very basic models (without decoration), which is why I prefer to call ahead before going. In Paris, for the moment, I only know of Place Saint Pierre where I can find what I need. For this tutorial, I bought some elastic with picot edges from Tissus Reine.
Step 1: Making the pattern
To make the pattern, you will take measurements from a pair of panties you already own. To do this, you will need to trace the three parts that make up a pair of panties: the front, the bottom, and the back.
First, fold the panties in half (back to back). Secure this fold with pins, place a sheet of tracing paper on top, then trace the front of the panties (be careful not to trace the back of the panties at the same time). Then, before removing the tracing paper, draw a vertical arrow to indicate the grain line of the fabric, with the arrow pointing downwards towards the bottom of the panties. Also draw two small arrows at the fold of the panties (these will serve as guides when cutting the fabric).
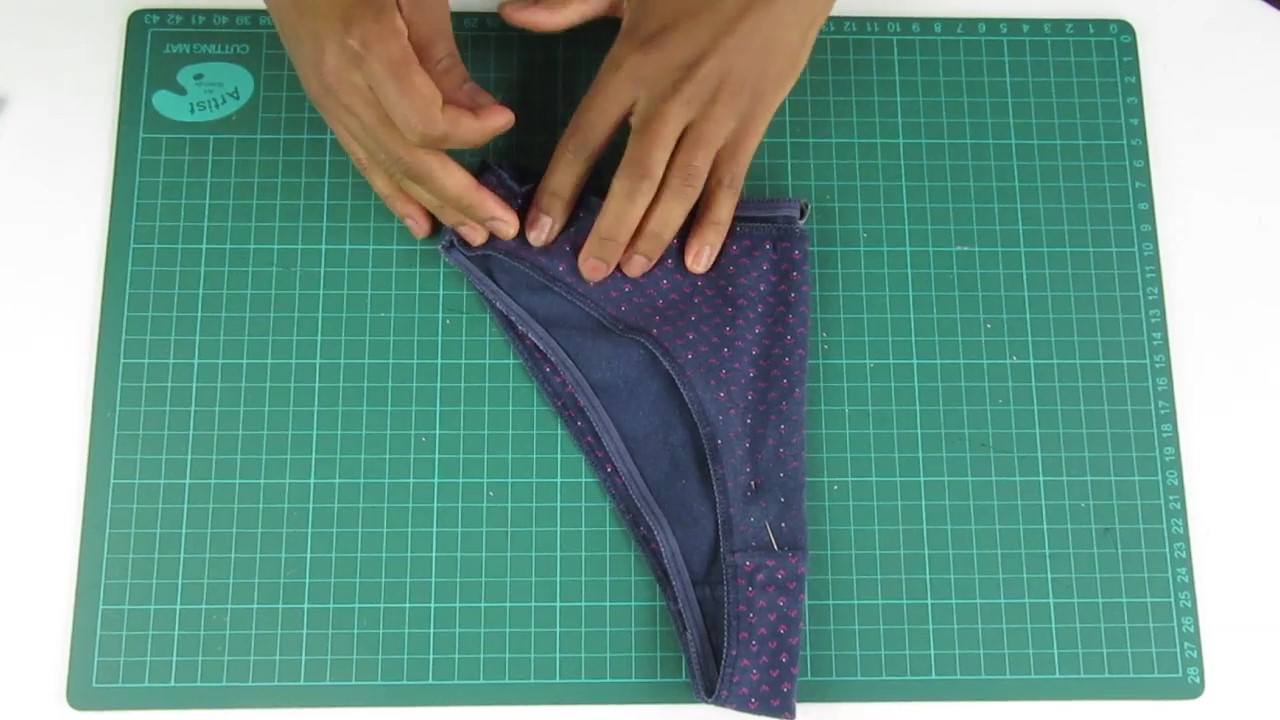
Repeat these steps for the front and back of the panties. Once all three pieces have been traced, double-check that the side lengths match:

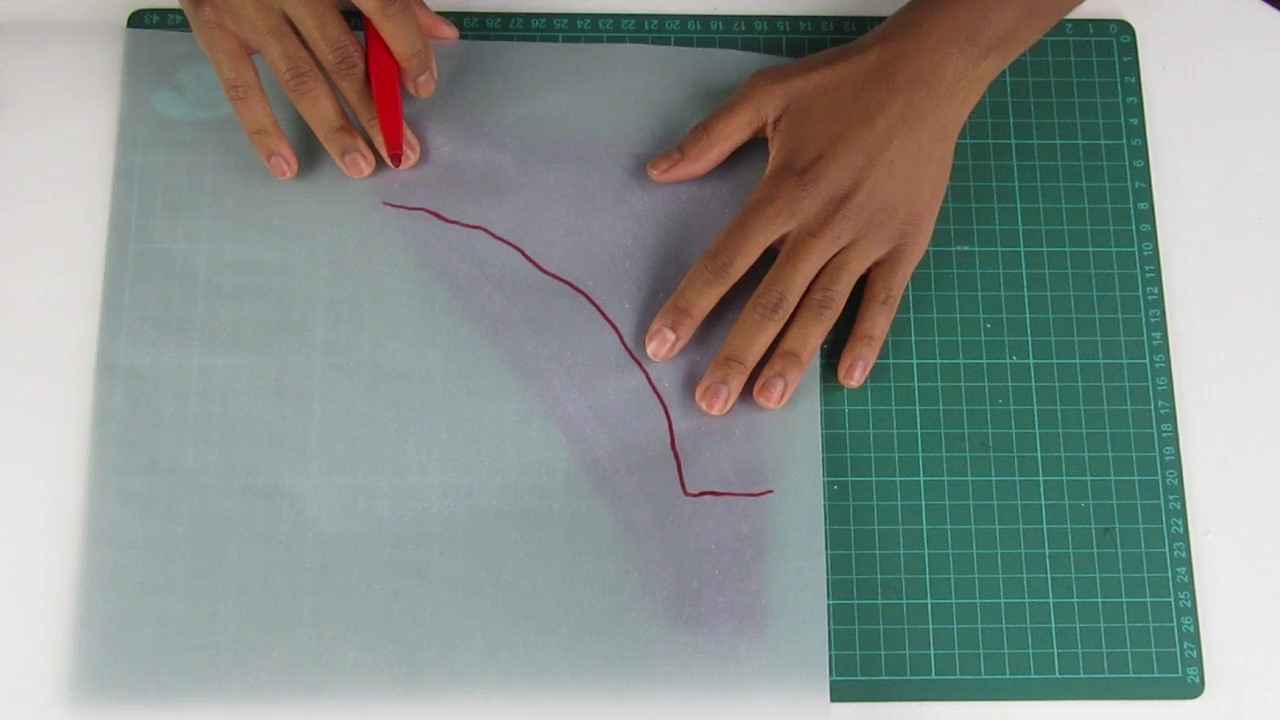
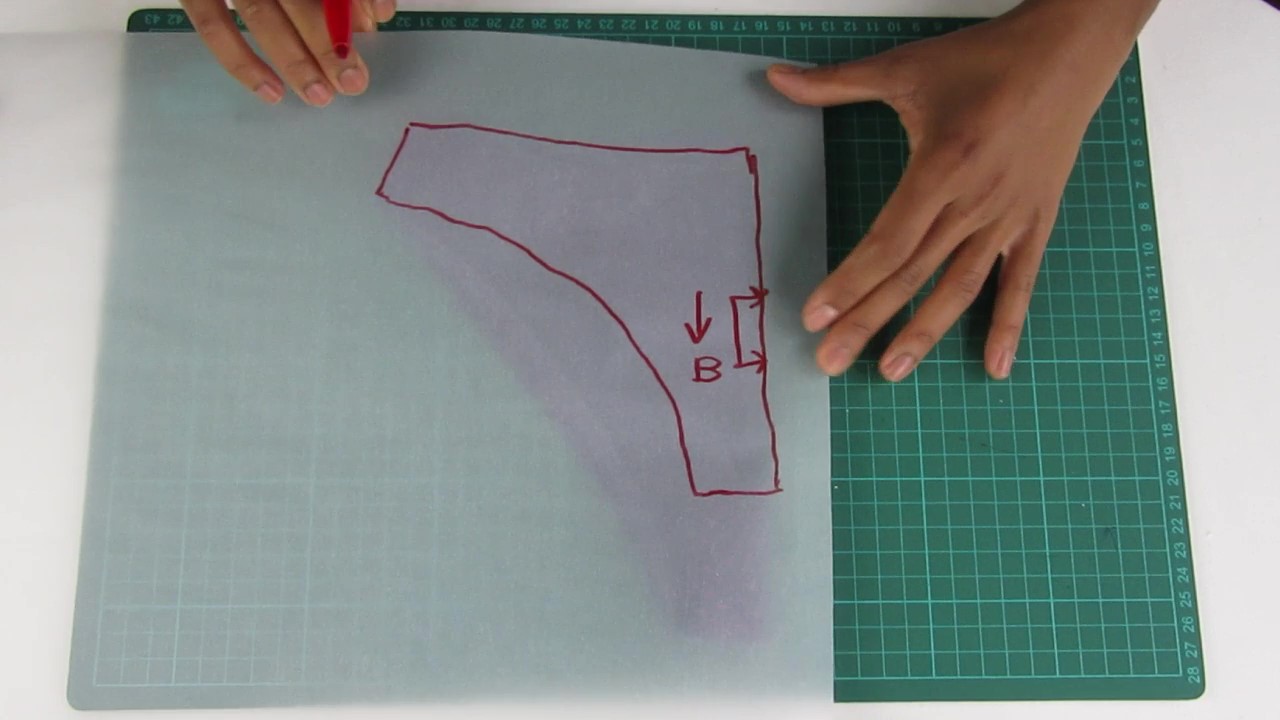
Now you need to mark the seam allowances. To do this, widen the pattern 1 cm, except at the pleats (where you placed the two small arrows):
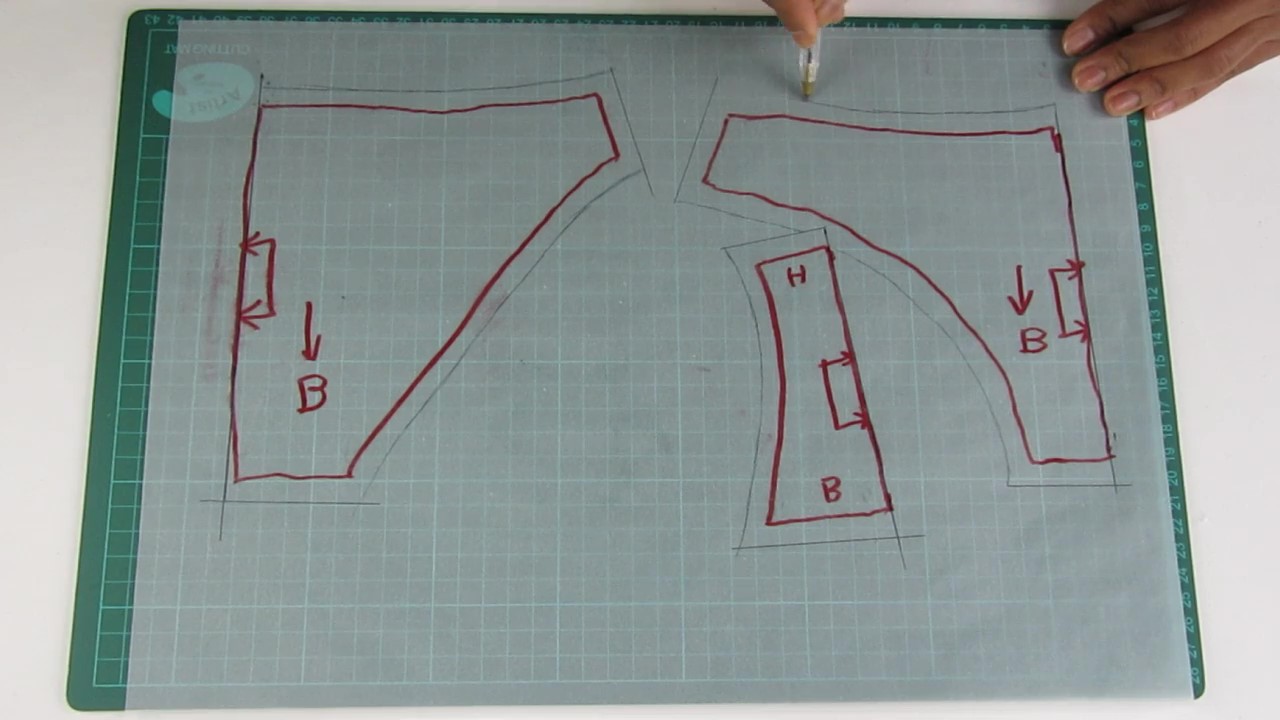
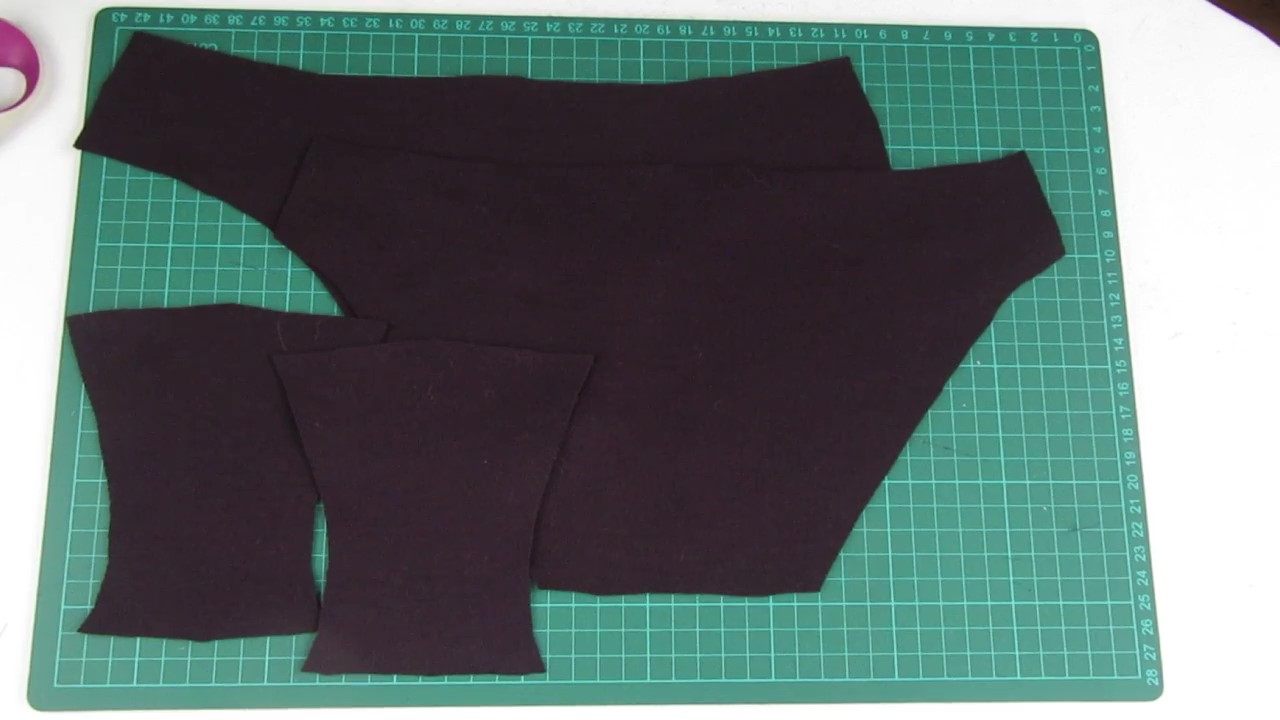
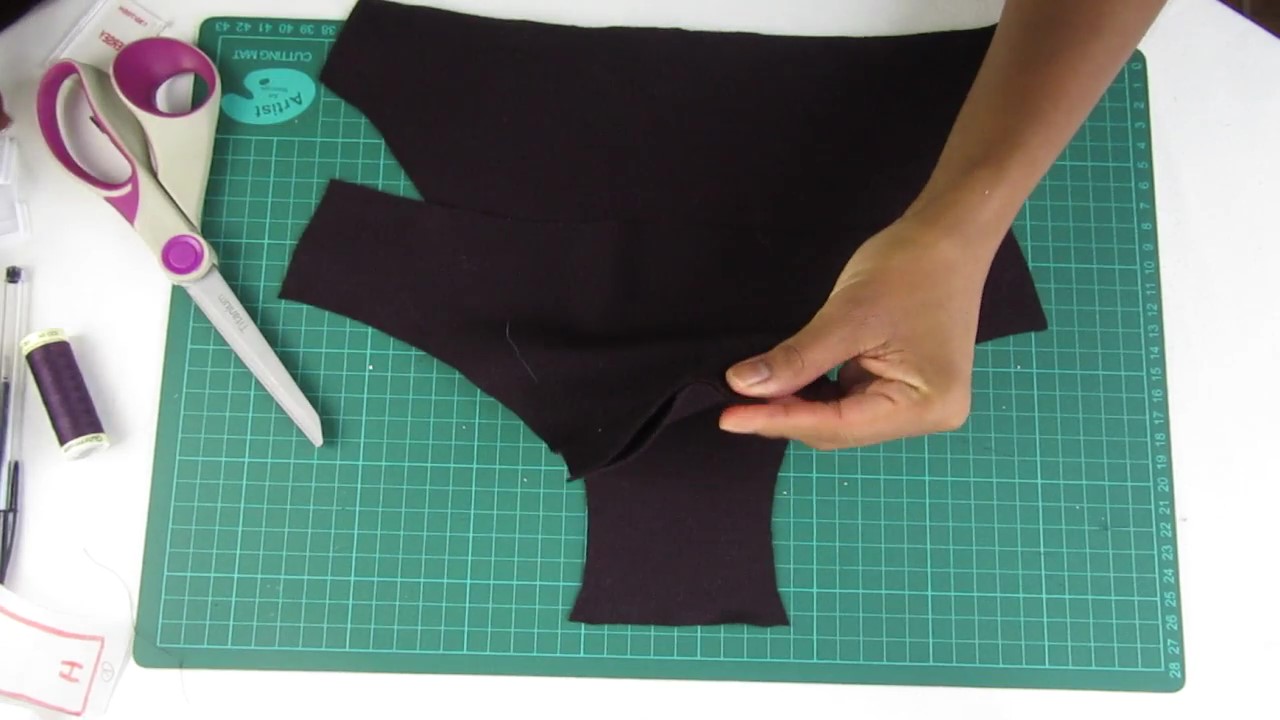
Next, cut out your pattern pieces so that you can position them on your fabric scraps. Remember that the sides of pattern the two small arrows must be placed at the fold of the fabric. Note: the bottom of the pants must be cut out twice. Once you have finished cutting, you will have four pieces:
Step 2: Sewing the 4 pieces together
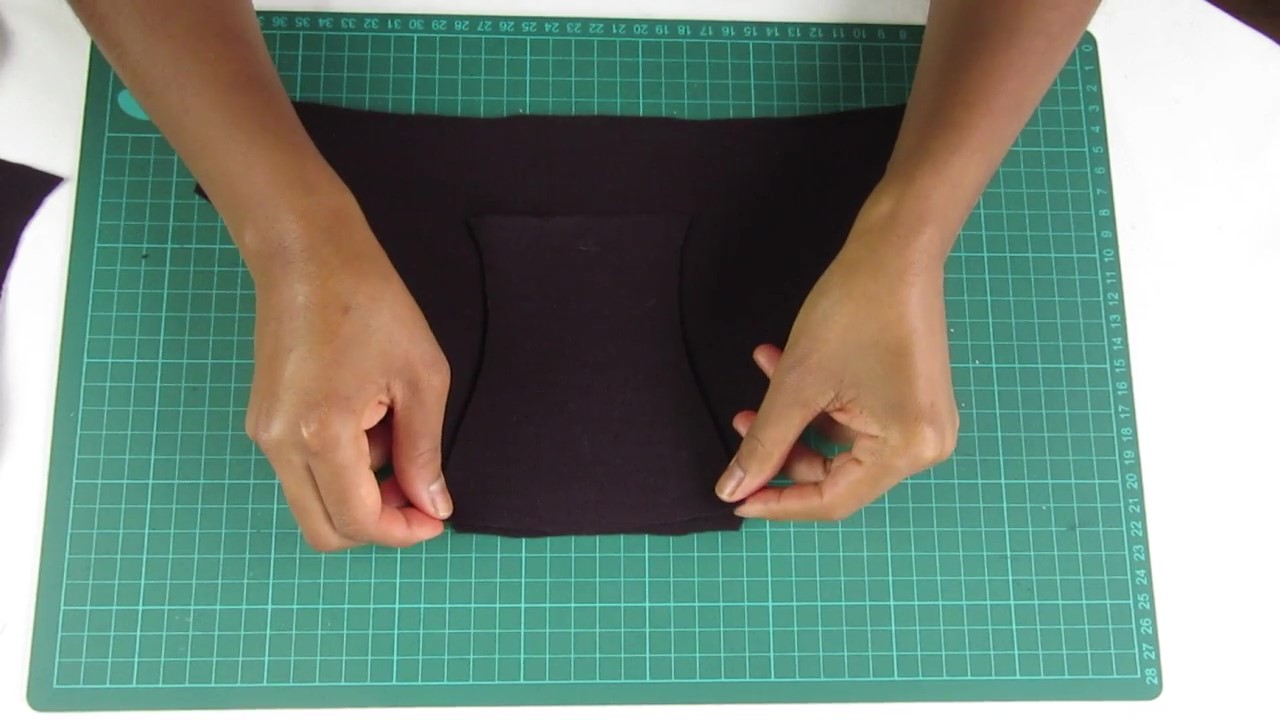
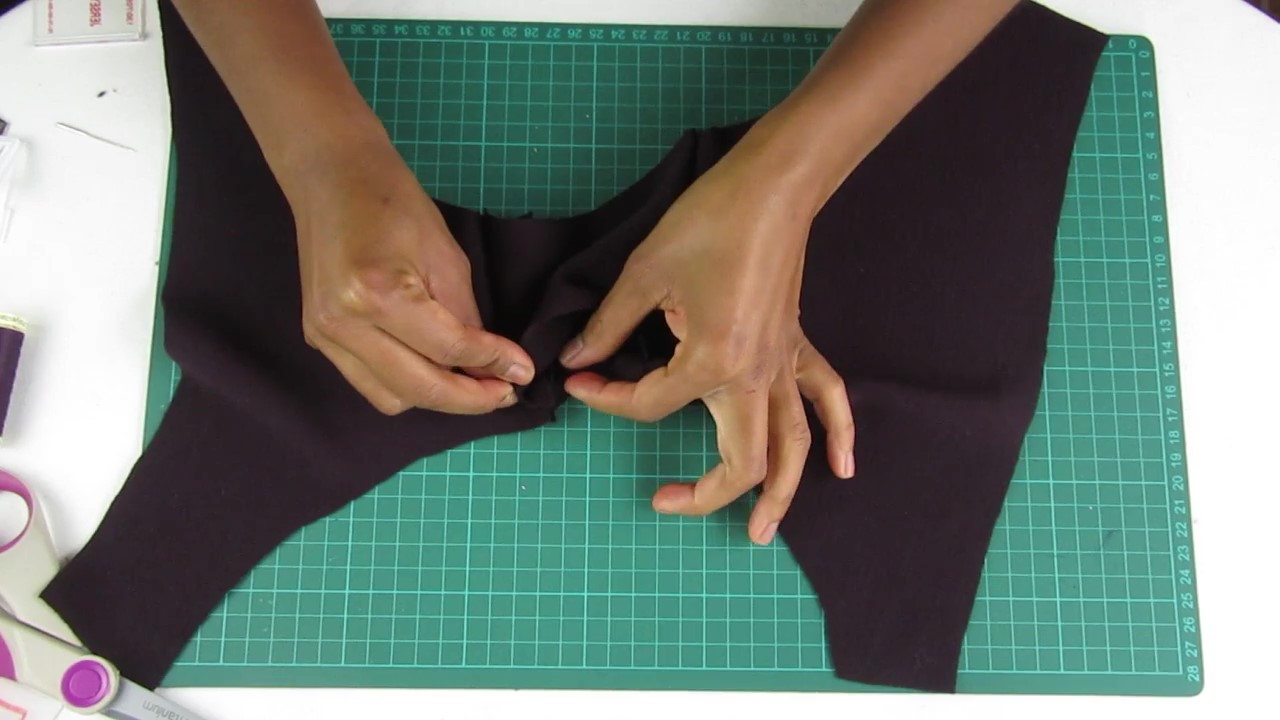
Place the bottom edge of the back of the panties face to face with the back edge of the panty liner. Secure with pins. Then take the second panty bottom and position the right side of its back edge on the wrong side of the bottom edge of the panty back. Secure with pins. The panty back is now sandwiched between the two panty bottoms. Stitch 1 cm from the edge.
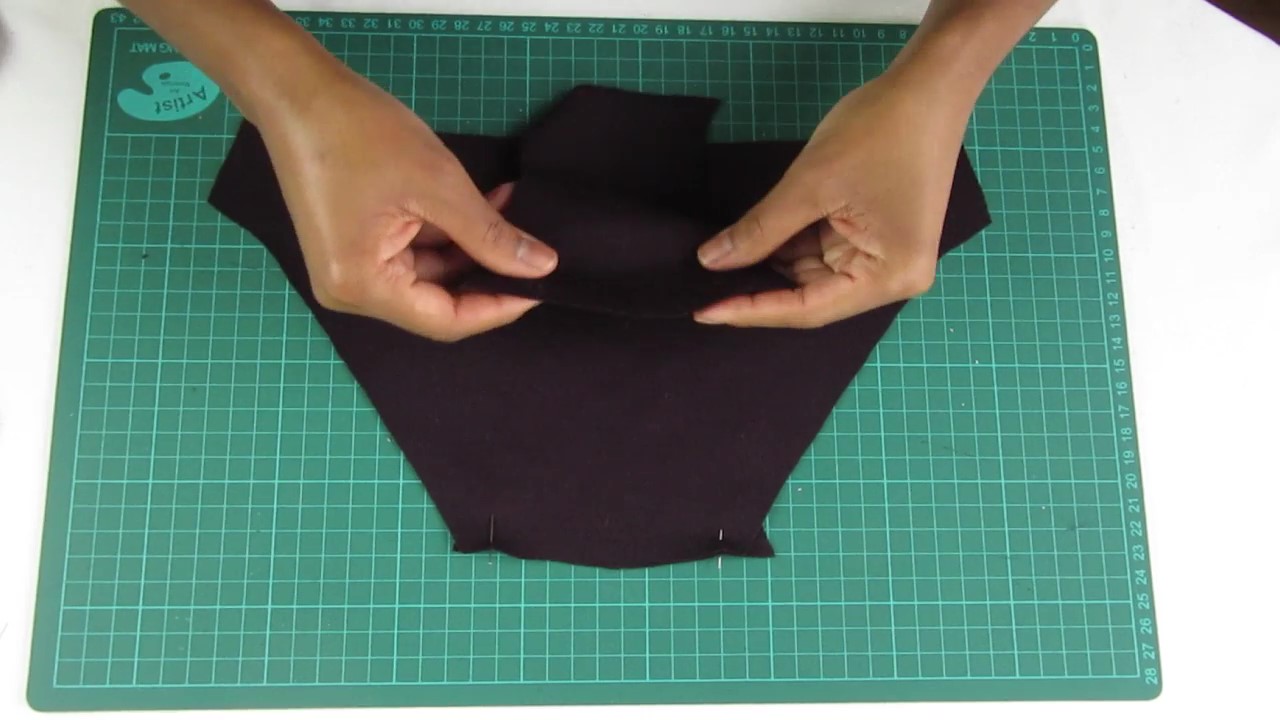
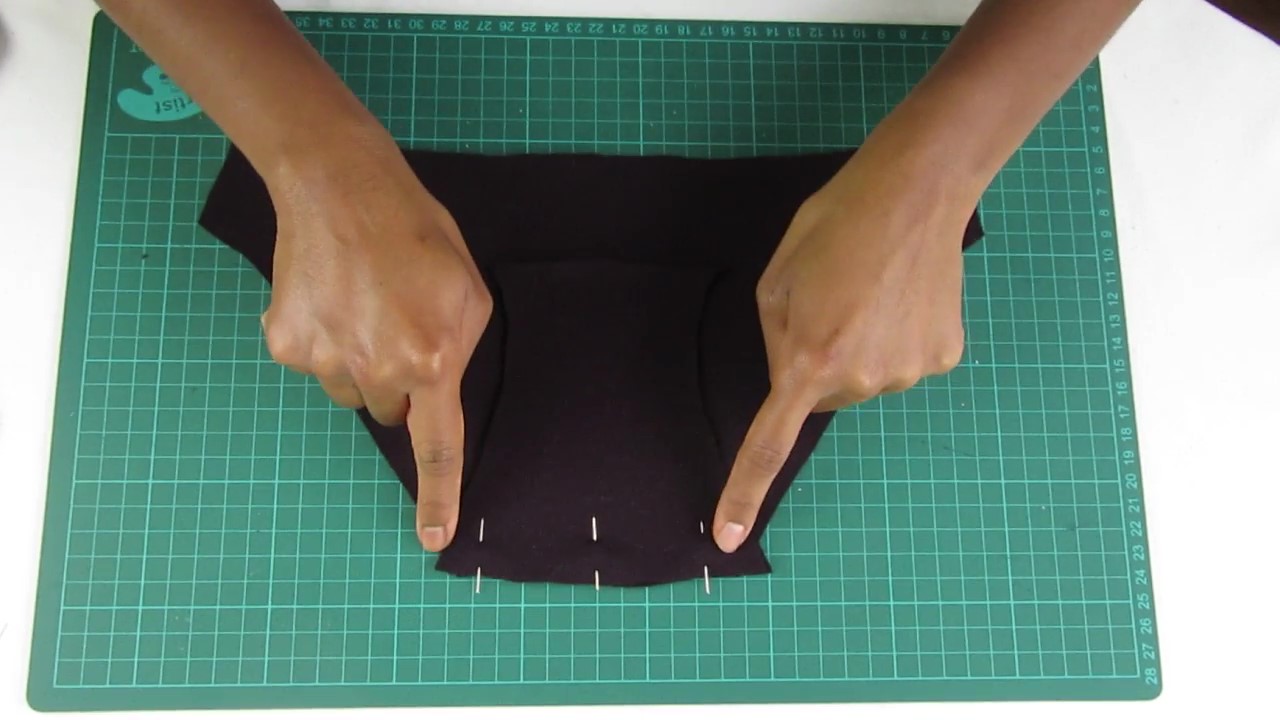
Now take the lower edge of the front of the panty and position it right sides together with the front edge of the panty bottom (the one that will be on the outside). Secure with pins, then stitch 1 cm from the edge. Finally, position the front edge of the other panty bottom on this seam, turning the work slightly, secure with pins, and stitch 1 cm from the edge.
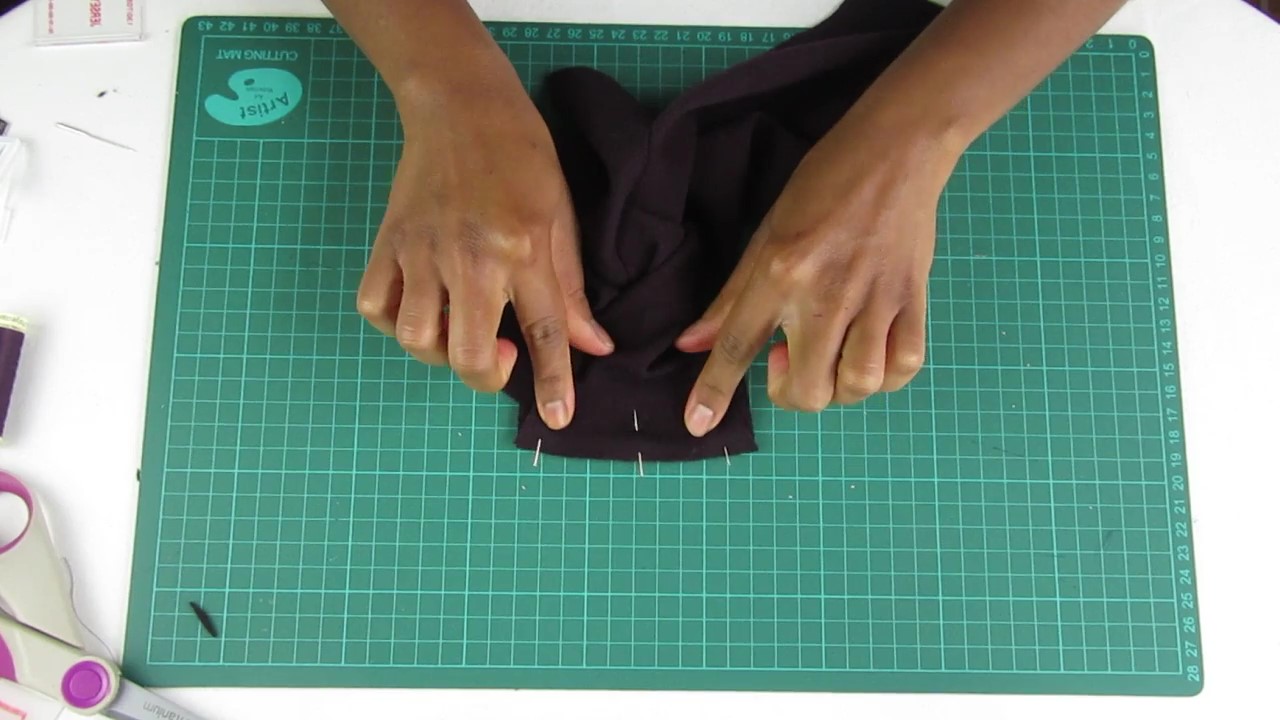

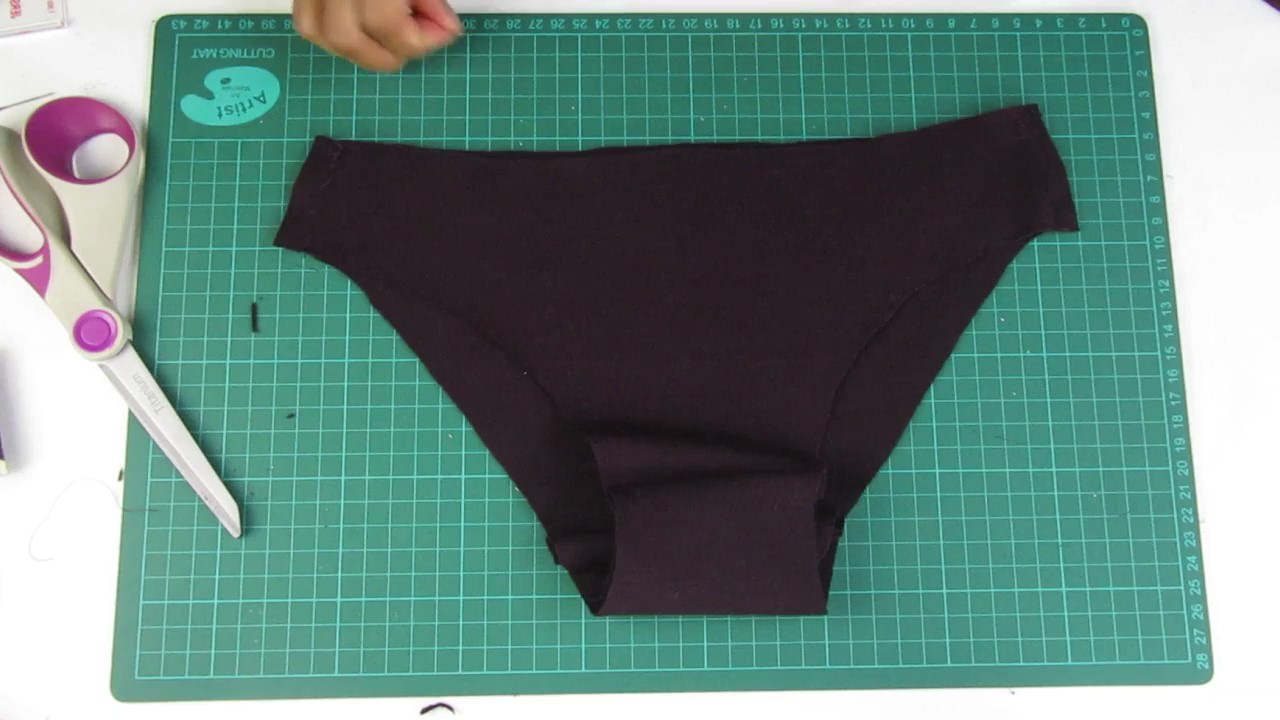
There you go, all the pieces are assembled 👍
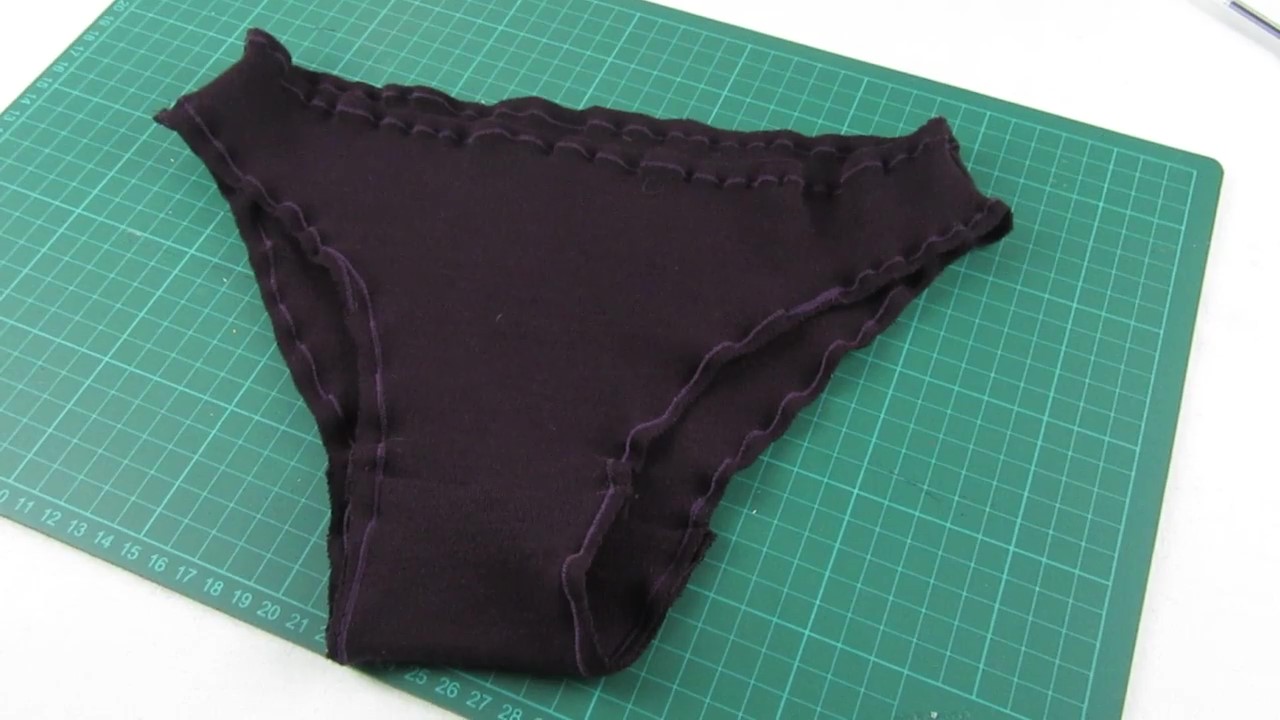
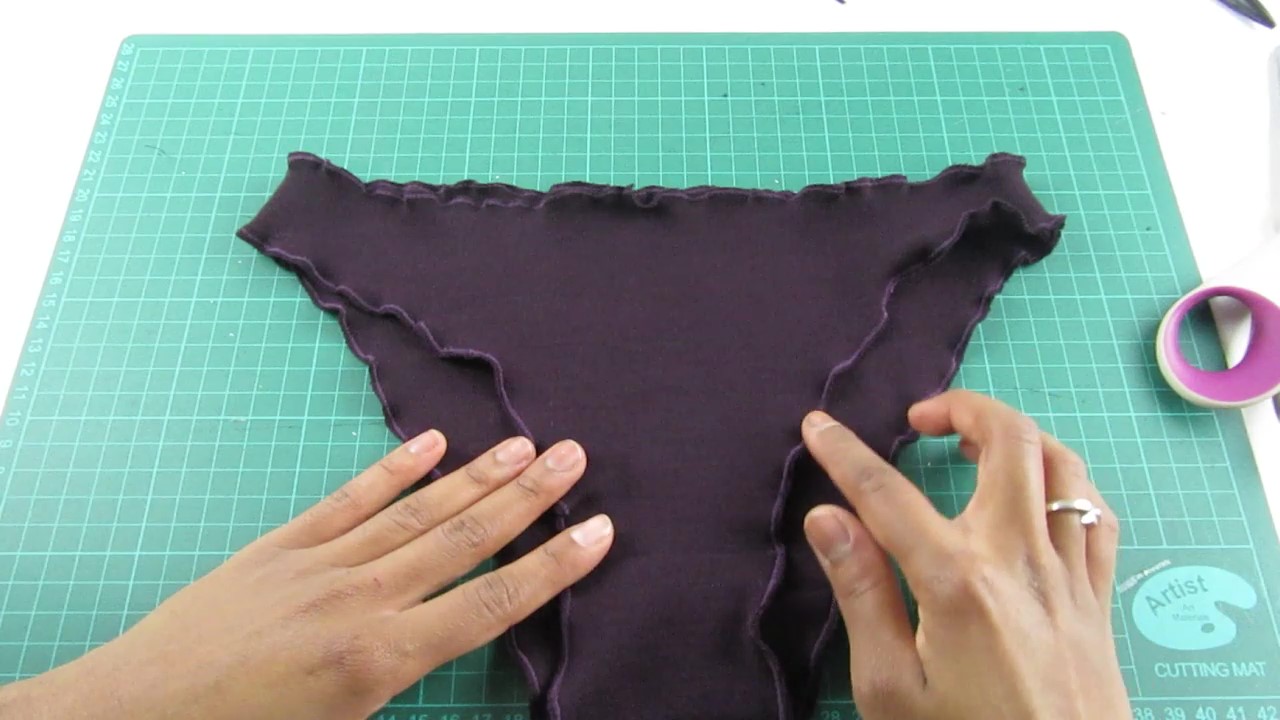
Step 3: Finishing the edges
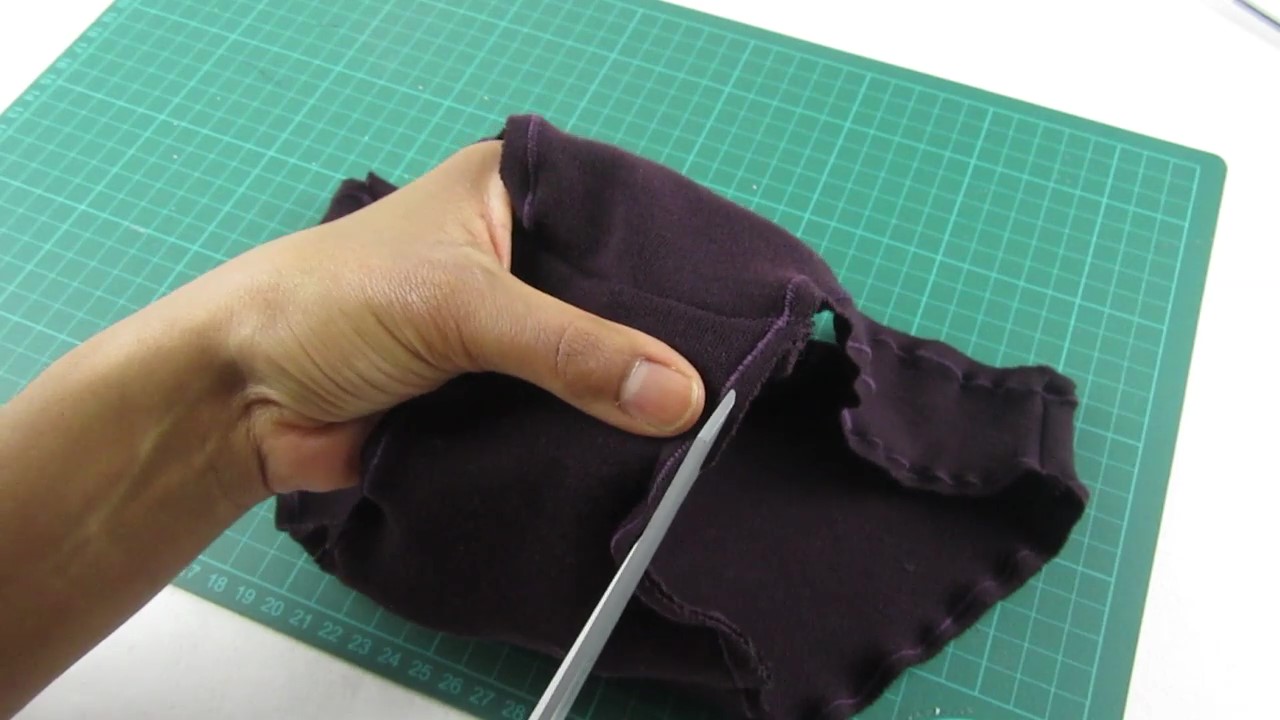
To make the edges strong, you will need to overcast them (or serge them if you have a serger). To do this, sew a zigzag stitch (stitch length 1 and width 2 mm) 5 mm from all cut edges and side seams. Be careful, the closer you sew to the edge, the more the jersey will tend to fray. Then trim the unsightly edges, cutting close to these finishing seams; be careful not to cut into the seam.
Step 4: attaching the elastic bands to the panties
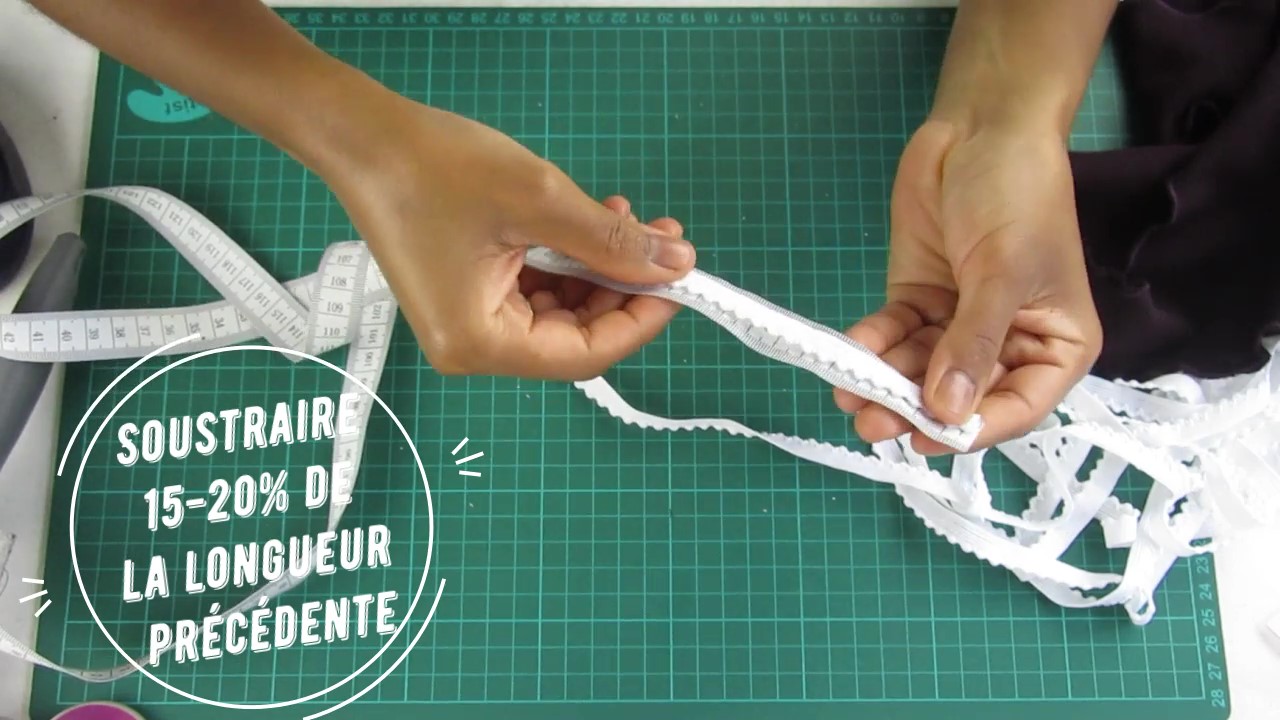
Measure the waist circumference of your panties. Subtract 15 to 20% from its length; this will give you the amount of elastic needed for the waist. Do the same for the legs. It is necessary to remove these 15-20% so that your elastic fits snugly.
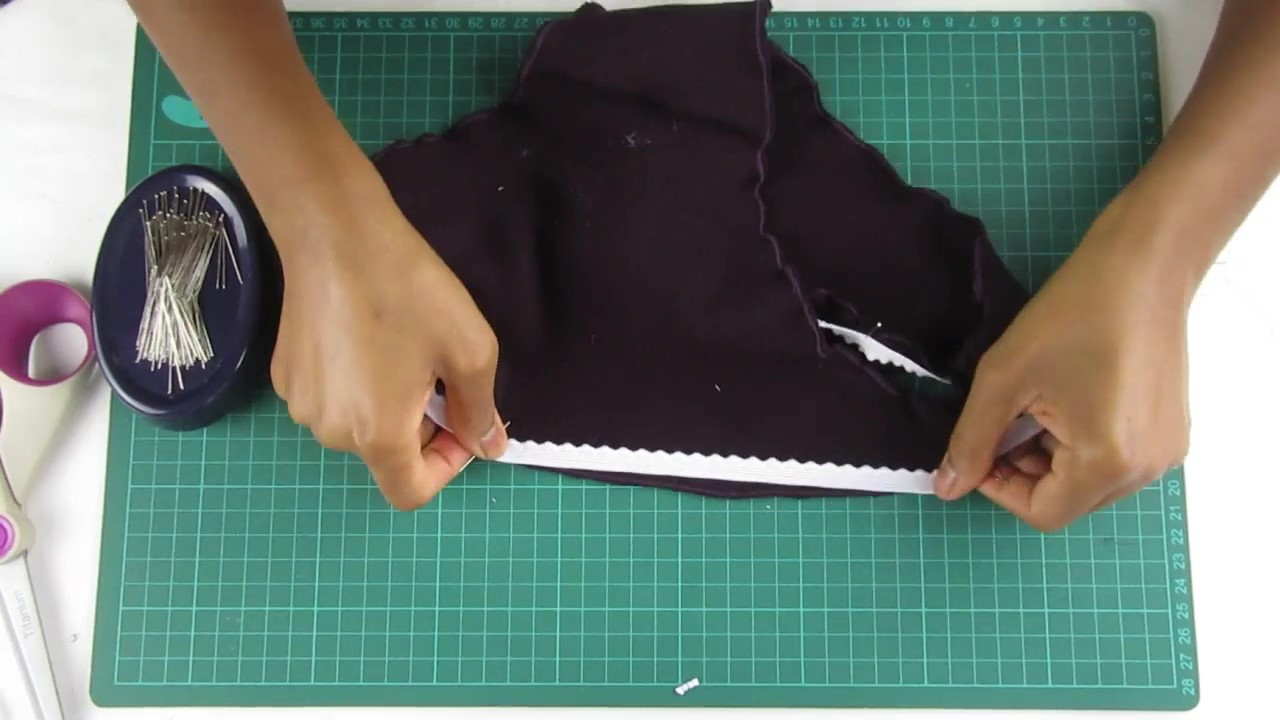
Pinning the elastic bands
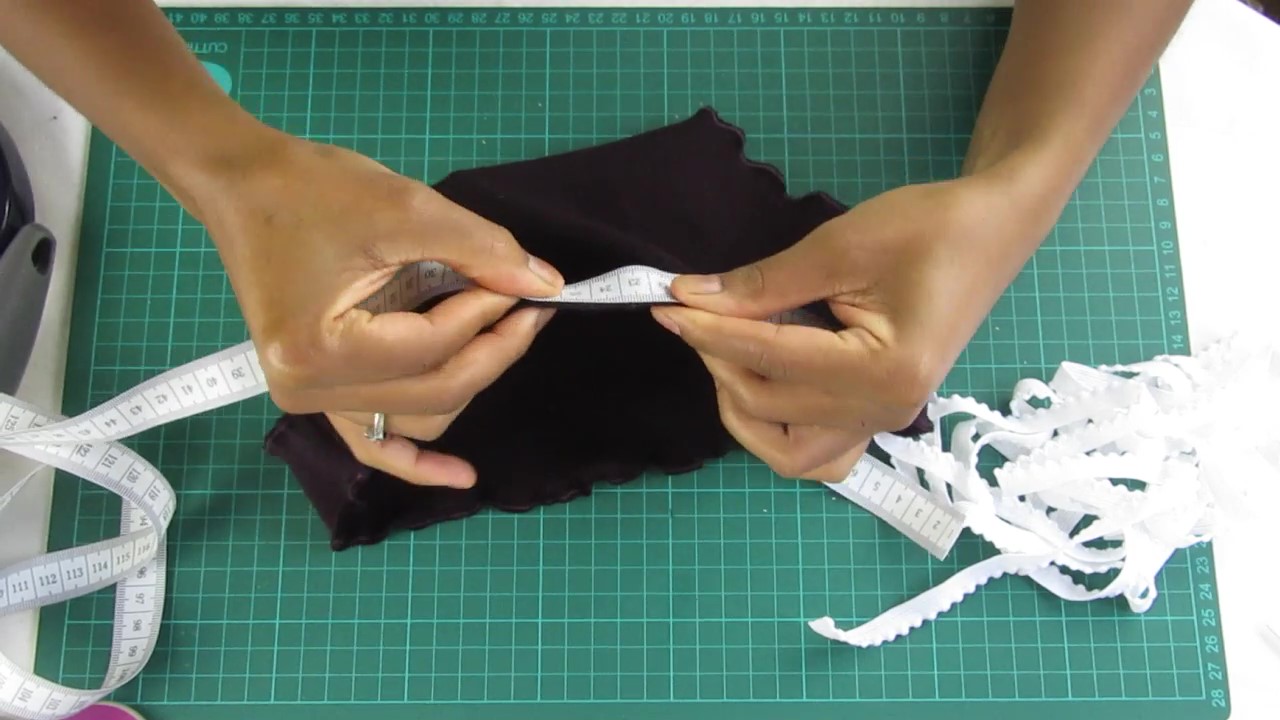
Then take the three elastic bands and close them by placing their edges right sides together and stitching 5 mm from the edge. Then cut these edges 2 mm from the seam.
Take the waist elastic, position the joining seam right sides together at one of the front-back seams of the panties, and pin edge to edge. Note: the edge of the elastic is the one without picots or lace.
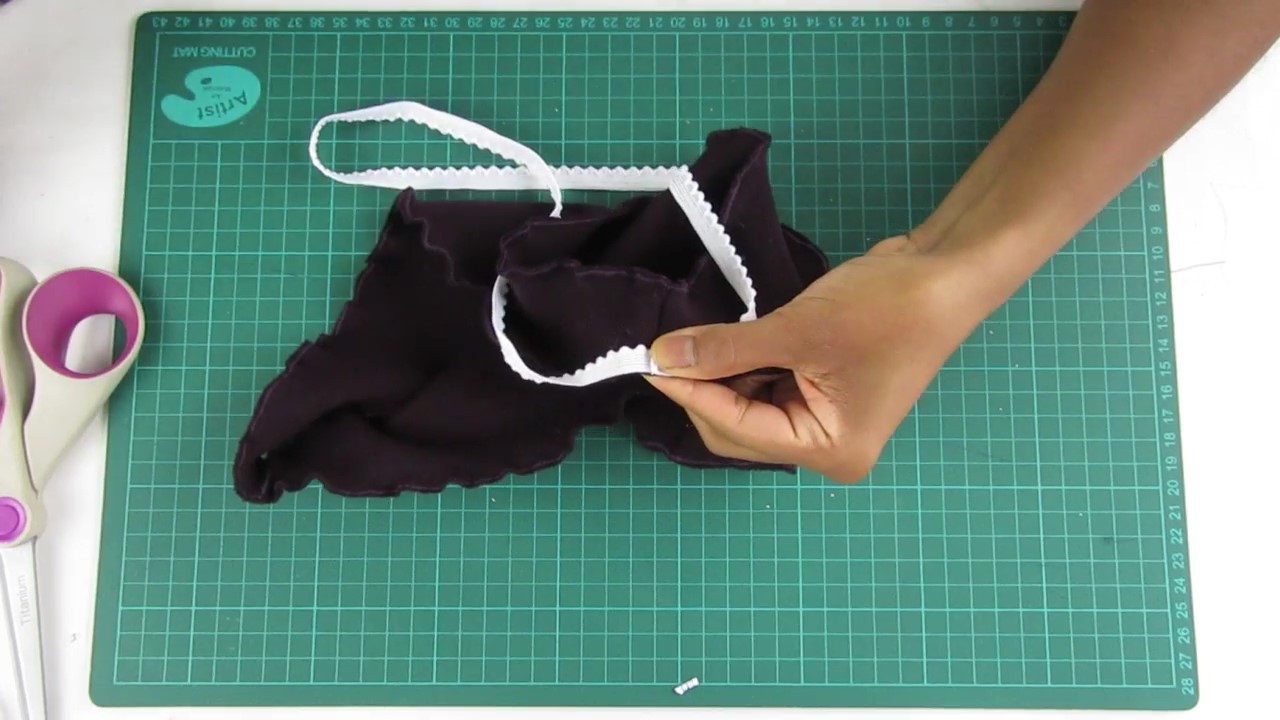
You will need to pin this elastic band around the entire waistband of the panties, but since it is shorter, you will need to stretch it to distribute it evenly around the entire waistband. Here is the technique I use:
- Take the first pin and fold the elastic into two equal parts. Then pin this fold onto the other front-back seam of the panties.
- Take the two pins and fold one side of the elastic (the side at the back) to find its center, then pin this center to the middle of the back of the panties. Do the same with the front.
- To distribute the remaining pins, pull on the elastic band each time and proceed in the same way as before.
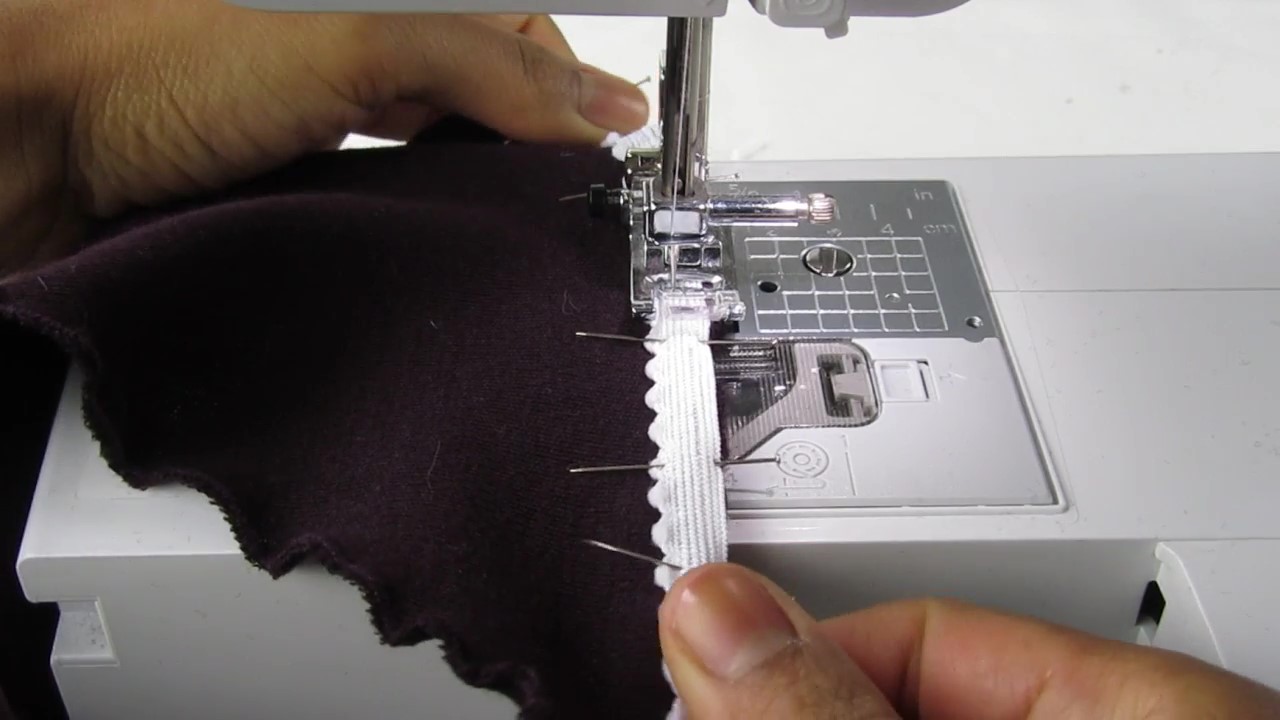
Sewing elastic bands
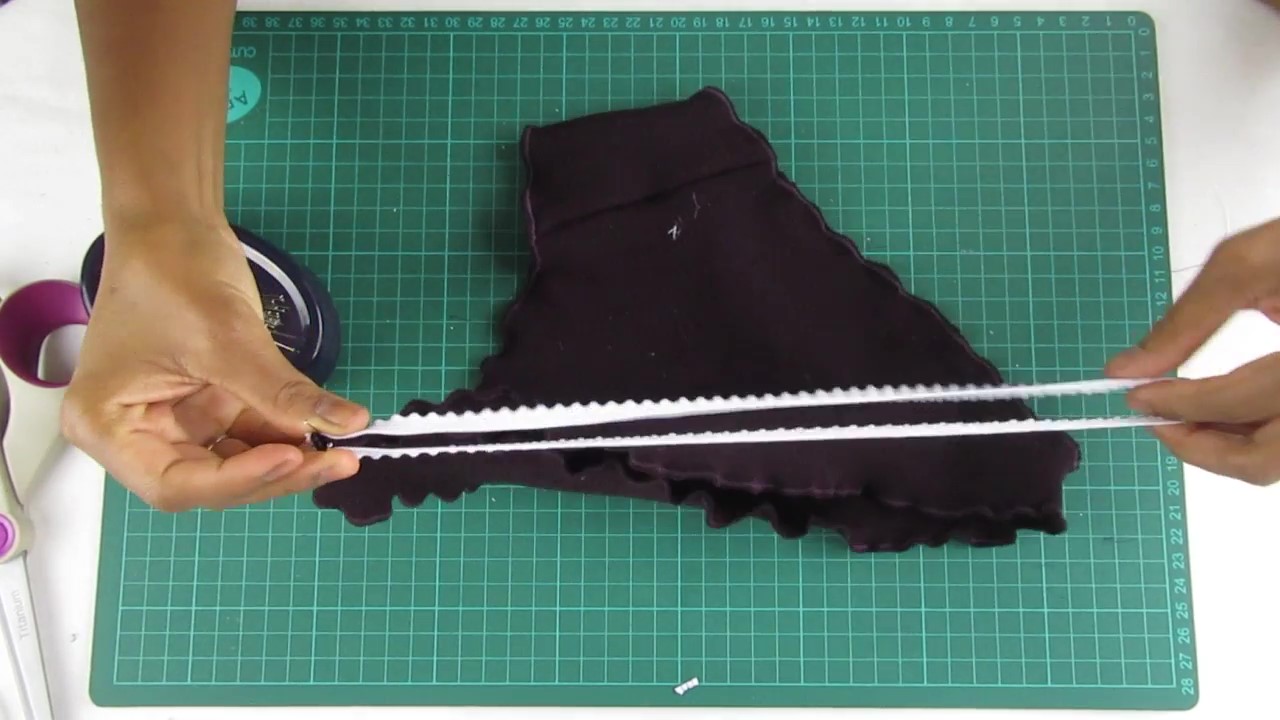
When you're done, you can move on to sewing. We'll start with a zigzag stitch (stitch length set to 3 and width set to 3 mm). For this seam, I recommend using thread that is the same color as the elastic. Sew the elastic (as close as possible to the picots or lace) to the panties, taking care to pull on the elastic (so that it is the same length as the fabric) at the front and back (so as not to distort the needle).
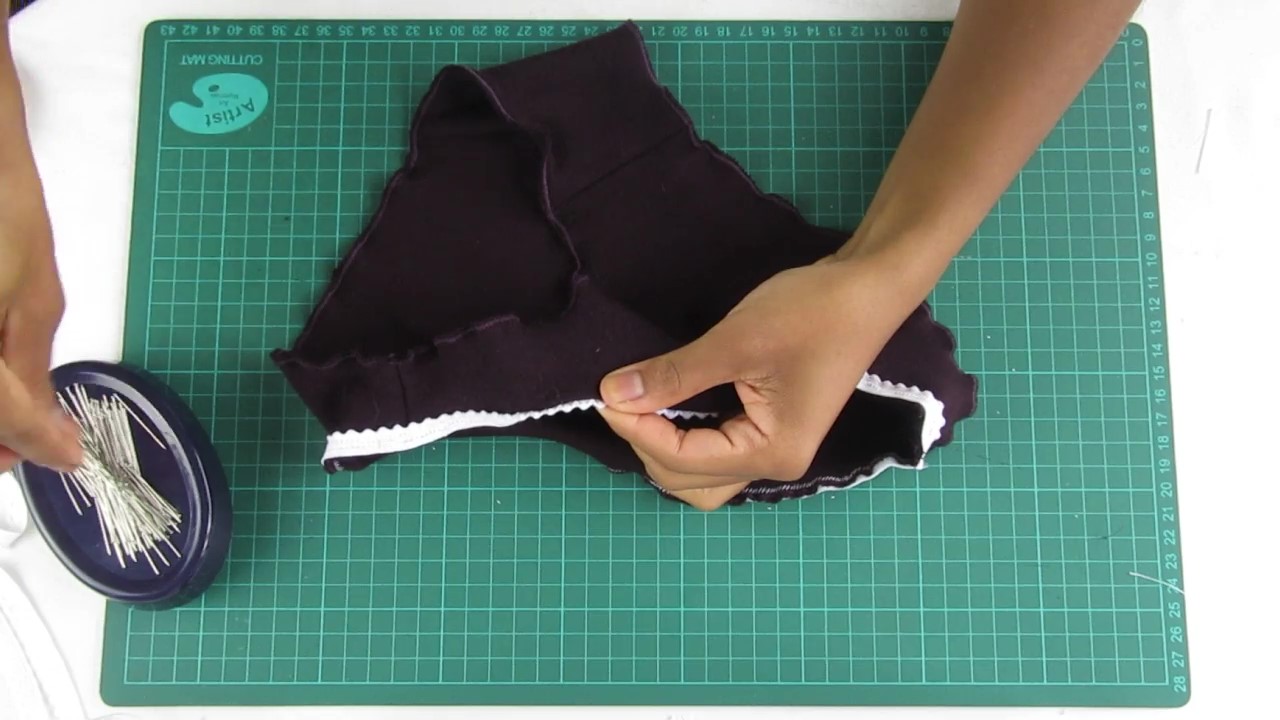
Then fold the elastic inward and secure it with pins. Stitch on the fabric side (again using a zigzag stitch—stitch length set to 3 and width to 3 mm) with thread that matches the fabric color.

Repeat all these steps with the elastic bands for the legs of the panties.
There you go, your panties are finished 🎉 You can see that there are two overlapping seams on the elastic. That's why I recommend using two different colored threads so that it doesn't look unsightly.
You can, of course, customize the pattern adding lace or embroidery to the fabric. If you're eco-conscious, consider using organic cotton ♻.