Sewing tutorial: learn how to sew a fabric pouch with a zipper

Today we are going to sew a small fabric pouch. In this tutorial, you will also learn how to sew a zipper.
This type of accessory is always useful for storing pencils, makeup, or even your cell phone... So keep that in mind 😉
In this DIY project, you will learn how to make a 20 cm wide zippered pouchwith a lining.

The materials needed to sew this pouch
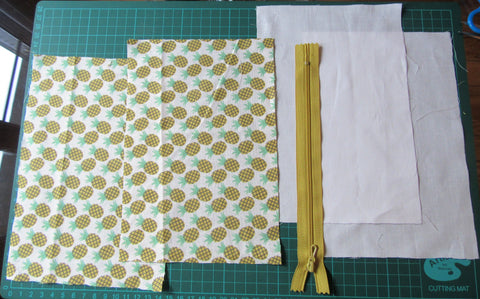
To make it, you will need:
- Two 22 cm x 15 cm fabric pieces for the outside of your pencil case (I chose a pretty pineapple pattern 🍍). I will refer to this as "patterned fabric" in this DIY project. I recommend using cotton poplin.
- Two pieces of fabric measuring 22 cm x 15 cm for the inside of your pencil case (I chose a simple white fabric). I will refer to this as the "lining fabric" in this tutorial. I recommend using cotton poplin.
- a spool of thread,
- a 20 cm long zipper,
- pins.
Are you ready? Let's go!
Step 1 for sewing your future pouch:
First, position the right side of your patterned fabric edge to edge with the right side of the zipper.The middle of your zipper should line up with the middle of the fabric. Then, secure everything with pins.

Step 2:
Next, place a piece of lining fabric edge to edge on the other side of the zipper (with the right side of the lining facing the wrong side of the zipper). The middle of your zipper must also coincide with the middle of the fabric. To do this, you can use the patterned fabric piece that is already attached to the other side of the zipper as a guide. Secure everything (the two pieces of fabric and the zipper) with pins, placing them perpendicular to the length of the fabric pieces.

Then remove the pins from step 1.

Step 3:
Now it's time to use your sewing machine! But you'll have to do it right 😉 First, sew this first assembly along the length of the zipper opening; do not sew after the bottom stop or before the top stop:

Next, you will need to attach the zipper foot to your sewing machine. If you have an electric machine, remember to select the correct program. Finally, remember to pin your fabric manually to ensure it is positioned correctly.
If you start sewing at the bottom stop of the zipper, when you reach the middle:
- stop sewing, leaving the needle stuck in the fabric,
- lift the crowbar,
- Move the zipper slider to the other side of the presser foot (otherwise, the slider will get in the way when you finish sewing).
- lower the presser foot and continue sewing.


If you start sewing at the top stop of the zipper, open the zipper before you start sewing. Then, when you reach the middle of your seam, follow the 4 points listed above.
When sewing, the closer the needle is to the zipper, the less visible the zipper will be once the pouch is finished. The choice is yours! Since your zipper is hidden during sewing, keep a finger on the zipper teeth as you guide your fabric; you don't want your needle to catch it.
If everything went well, you should have obtained this:

Step 4:
On the other side of the zipper, repeat steps 1 through 3.


Step 5:
Open the zipper(don't forget this step, otherwise you won't be able to turn your kit right side out) and fold the two patterned fabrics on top of each other. Secure everything with pins.


Sew the assembly, taking care not to sew the zipper.

Step 6:
Fold down the two pieces of lining fabric and pin them together.Sew in two stages, leavingan opening at the bottom of the lining. You can mark the location of this opening with pins:

As before, sew the assembly, taking care not to sew the zipper.
Step 7:
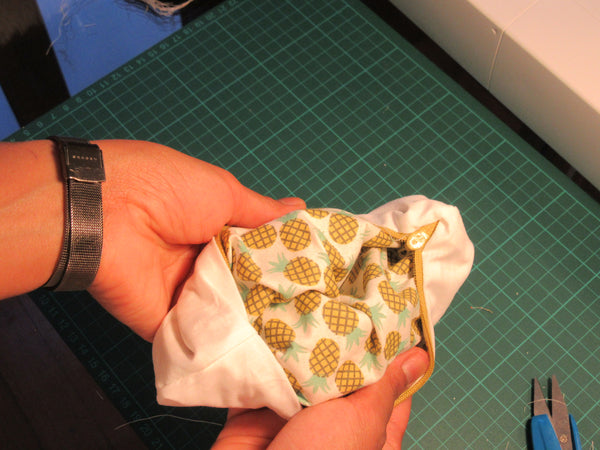
Your kit is almost complete! Now turn your entire project inside out by passing it through the hole left in the lining.


You will then have your zippered pouch inside out. Finally, sew up the hole left at the bottom of the lining.


Step 8 to finalize your folder:
There you go, you're done! All you have to do now is put your kit back in its place 😉

There you go, your pouch is finished 🙂
If you want to take your sewing skills to the next level, check out my beautiful patternsfor sewing your own clothes.
See you soon!
Cadia